Wednesday, October 22, 2008

Harvest time!

The final harvest is here! All of the plants have have been killed by the frost and I still have lots of green tomato's! So I pulled all of the plants and cleaned out the beds and picked tomato's that were left over. The Deer earlier in the season munched my plants down so they got a vary late start, so I have allot of Green tomato's. Actually I only got a few red tomato's from my plants but that didn't stop me from preserving my tomato's for winter time stews and chili.

\


Well here's an up date on how the tomato ripening tray is working it works great!


As you can see I'm storing them a way for a cold day, when hot chili will taste good.


Next year I think I will try canning, freezing works good but it takes a lot of room in the freezer.

Wednesday, October 15, 2008

So many projects under the sun so little time (Update!)

Well I have a small step towards energy independents! I took the VW solar panel and retrofitted the ODBII plug with a set of Anderson power pole plugs so I could charge a 7.2 Amp hour 12 volt sealed lead acid Battery. I then took an old Pampers diaper wipe box and put the battery in side and mounted a cigarette lighter socket in the side of the box. After that I cut a chunk of wood to screw the cigarette liter socket to stiffen it up, then I screwed two four bladed terminals blocks to the other end of the chunk of wood.


With that done I connect the battery and the cigarette lighter socket to the terminals and made up another set of Anderson power pole plugs to connect to the terminal and ran them out off the side of the box to plug in the solar panel into for charging the battery.


The best part of this set up is I can use the Anderson power pole plugs to charge the battery from the solar panel or plug battery from the box into a radio or any thing else with Anderson power pole plugs on it.


Well I conclusion have made a small step towards energy independents because i can charge my cellphones from the sun and all the other small gadgets like my ipod and other stuff. In the design I have only a few concerns, one I think I need to vent the box because of heat. Also I'm not sure if the terminal blocks will heat up on the wood block under heavy load could be a problem. The last one is the charging circuit was for a car battery not a small sealed lead acid Battery. It does work I can charge my phone so I guess I will test and let you know what happens in a later update.

Friday, October 10, 2008

Time to harvest the tomatos! But there Green!


Well it is time to harvest my tomato's, But what do you do with green tomato's? We've have had at least 3 hard frosts and it end of October. I tried to cover the tomato's so the frost wouldn't get them. It worked OK, but I keep forgetting to put the cover on at night and take it off in the morning. So for this year I gave up because the plants were half dead and full of green tomato's. Plus a lot of them are splitting because there big. So what to do? Well I remembered mom putting tomato's in a paper bag to ripen but that was one at a time. I know if you put tomato's in the sun the outside will turn red and look ripe but the inside will still be green. So i did some research and found tomato's ripen from the inside out and from the bottom up and they don't need sun to do that. I Guess you can just put them in a warm dark place and the will ripen on there own. Well that took me to my next project a tomato ripening tray!
Basically the tray is an optional pot tray from my kitchen cabinets that i never installed. I used it so if any of the tomato's got rotten the mess would be contained, I also put some plastic in the bottom of the tray so if any did rot then the tray would be protected. Then I cut a paper grocery bag down one side and all way across the bottom and put it in the tray and cut another to go over the top this way it keeps it dark and holds some heat plus protects them from dust or any thing else. So far so good it works well! I did find out a few things a sense tomato's ripen from the bottom up turn them over that way the weight is on the part that ripens last and it won't get mushier. Also as they ripen i keep the green one on side and the more ripe one on the other side not sure why, but they seems to ripen then at the same pace. Ya I know it doesn't make sense but what can i say.

Sunday, September 7, 2008

The latest back yard project (Just Finished)

This one was a back breaker the patio is 60SQ FT at 42 pounds a block. The dirt area is 400 SQ FT and took 5 yards of pea gravel to fill. The hard part was moving the 5 yards off pea gravel from the front yard to the back by hand I wish I had a bob cat.


I think our new patio and play area for the kids turned out nice.


The best part is now have 460 SQ FT less of lawn to cut!

Thursday, September 4, 2008

Sun Dryed Jalapeno pepper


The chives went so well I though I would try some Jalapeno pepper! I didn't get as much out of The Jalapeno peppers as I though I would. I think that's why people tie them up with strings to dry them and then crush them for the pepper, well lesson learned. It was still better to save them while they were good then having to toss them out once they went bad.

This is how they turned out.

Tuesday, September 2, 2008

Sun dryed Chives


I decided to try my hand at dehydrating some of my chives from my garden. I decided the best way to do it was to use a pair of scissors and cut the chives and then wash them after washing the chives I used the scissors to cut them in small uniformed peaces. I put the chives on a baking pan on the deck between the hours of 12pm to 3 pm that's when the sun is the hottest took about 2 hours.


this is what they looked like when they were done not to bad.

Sunday, August 24, 2008

My version of a Rememberall

This is my version of a Remberall to help you remember trips and places. I though of this well in Santa Monica at the Pier there was a guy there that for 10 bucks would write your name on a grain of rice. I though it was cool and a neat way to remember my trip to the pier but not for 10 bucks. So I though I'll just find a rock to take home to remember the trip. Well I got home and was going to put my rock with the rest of the rocks from other trips, when i started to look at the others and couldn't remember where they came from,so i came up with this idea. You have to love sharpie markers you can use them like duct tape!

Friday, August 22, 2008

So many project under the sun so little time to get them all done

So I was on eBay the other day and was looking for solar panels and came across these VW solar panels. There pretty cool they were going for around $22 - $50. I was wondering where they came from because as far as i knew VW wasn't in the solar business. Well there not, the panels were made by IPC solar for VW to keep there car batteries from going dead well there cars were being shipped from Germany. So the question is how were the people on eBay getting them? Why because there cool and I wanted one to play with for my ham radio emergency power project. So I found some guy's blog like mine and found out if you ask the VW dealer they might just give you one. I asked they said no that they ship them back to VW. Not true! A friend of mine with a vary nice Audi who has allot of work done on his car asked one of the mechanic's at the dealer for me and he produce 2 of them one me and one for my friend.


Arduino-compatible Bare Bones Board

Well i'm diving in to the world of Arduino! I ordered my Arduino-compatible Bare Bones Board from http://www.moderndevice.com/ I receved it pretty fast. This is what came in the mail


Whats Arduino you ask? Arduino is an open-source electronics prototyping platform based on flexible, easy-to-use hardware and software. It's intended for artists, designers, hobbyists, and anyone interested in creating interactive objects or environments.
Arduino can sense the environment by receiving input from a variety of sensors and can affect its surroundings by controlling lights, motors, and other actuators. The microcontroller on the board is programmed using the Arduino programming language (based on Wiring) and the Arduino development environment (based on Processing). Arduino projects can be stand-alone or they can communicate with software on running on a computer (e.g. Flash, Processing, MaxMSP).


Going well so far it's taking shape!


It's alive! Hello world!

Thursday, August 21, 2008

The big switch to digital T.V.


I made the switch to digital T.V. for any of you that know me you know I did it on the cheep! I went to the government web site and applied for the 2 -$30 coupons and went out and started to read the reviews on the converter boxes. I ended up picking the Magnavox TB100MW9A .


So now I had the box now I needed a antenna once again I had to do it on the cheep or DYI in this case. By the way this was after I found out any rabbit ears would work, but any of you that know me rabbit ears just wood not cut it. So this is what I ended up with.
the design was from utube it works good but now i need to get it up higher and i need a rotator. if anyone has one that they want to get rid of let me know.

Wednesday, August 20, 2008

Handy tool you can make your self!


I saw this at one of those old time country stores so i took a picture with my phone and went to work making one. It is made from a miss dig marker flag, I twisted it around a 1 1/2" pipe to make the end then twisted it tight for a few inches. I took a peace that i cut off before i twisted it around the pipe and twisted it around a pencil to make the slider. Then i took it off the penile and slide it over the two straight ends after the twist. then you take a pair of pliers and bend small loops for grippers and that's it your done! now you ask what is it? well take a guess.


Tuesday, August 19, 2008

Make your own oil lamps for your deck!


I found this one on another blog called (Judy of the woods) she is a bit strange, but she is doing some cool stuff like this oil lamp. It's made from a salsa jar I had and the wick holder is a piece of copper from some house wire the wick is just string. The oil is just veg oil from the kitchen that had gone past it's use by date. I put a link to Judy's blog in my blog list, she has pretty good how to on how to make it on her blog. I will give you a hint though use a bobby pin to pull the wick through. Also another hint if you make the handle to fit in the jar you can put a lid on it to snuff the flame, plus if you want to store it out side it keeps water and dirt out of it.


You can see the difference between the two pictures here, ones out and the others is in the jar. By the way no I didn't fix first one I made another one. There vary handy out on the deck at night.

You can do it with out a handle but if you want to take it out and replace the wick or light it, it's easier with a handle. That's what the tool in my other post the (Handy tool you can make your self!) was for.


Tuesday, August 12, 2008

Build Your Own Arcade Controls can you say (Tron Spinner!)

A friend of mine got me on this kick to see if i could build my own arcade spinner plus if you had to buy one there $60 to $130 bucks. So here is my prototype


I used the guts from a ps2 mouse that is what the circuit board and the encoder wheel is from. The rest of it is a metal plate with a screen door baring spot welded to it, with a threaded rod with a nut on each side. The the spinner nob is from an IBM typewriter the encoder wheel is held on by shrink tub that works pretty well by the way. I have no idea where i got the bract from it was a mount for a fan. I have to find a better way to mount it all but it works.

Monday, August 11, 2008

Just an up date on my MAME project

This is where I'm at with my MAME project. For those of you who don't know what MAME is, well it stands for (Multiple Arcade Machine Emulator) it's soft and hardware for emulating most of the original Arcade Machines. So far I have a prototype of the controls to see how the work with the software here is a few pics.


The control box seems to be working well. I found an old cabinet to house it all in, I started to strip out the old part out and the laminate off the sides of it that someone glued on.


This is what the cabinet was in it's former life.

Sunday, August 10, 2008

Blacksmithing Tools (My Anvle Stand)


This is fairly new peace of equipment in my shop,
I decide to build a stand for my anvil because
the tree trunk didn't work vary well indoors plus it was heavy! and that's before I put the anvil on it. It's made from plywood and 2x6 boards screwed together.


I think it turned out pretty nice.

Thursday, August 7, 2008

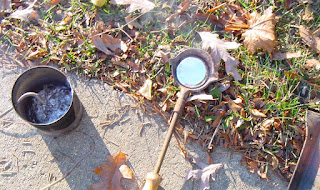
My first melt (Home Foundry Fun) Vary Hot!!!

The first thing i will say about this its dangerous! You can be burned bad or kill your self! So don't try this at home or if you do I had nothing to do with it you were warned and Darwin will take over. So this is the other half of the story of why i got into blacksmithing i was looking for an easy way of melting and pouring aluminum. I wanted to do some sand casting at home and i didn't have a foundry so this is where I'm at that